Wednesday, March 16, 2011

Special Delivery


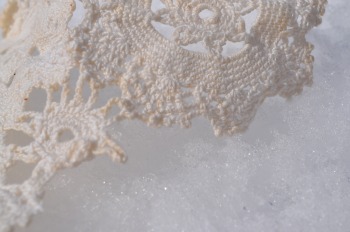
If you've ever known the surprise of  
finding a special package on your doorstep, then
you'll know exactly how I felt when I recently
discovered a canvas tote bag stuffed
full of these lovely antique gems.

Only a very dear friend would leave such a gift,
would so freely hand down treasures
from her own collection, would know that these 
speak volumes to me.

My imagination is flooded with possibilities.
My heart is warmed at her generosity, care 
and thoughtfulness.
Thank you, my Very Dear Friend.


Sunday, March 13, 2011

Open Studio Sunday


Giggles, and more giggles.

Freshly printed onesies to stock the shop,
accompanied by a coordinating collection
of embroidery designs. Sweet!


Friday, March 11, 2011

Finally Friday...


Spring is near.


And this festive little booklet is a cinch to make. 
It's so easy that you might have a pile of them
before you can turn your clock ahead tomorrow night!

Rummage through your paper scraps, magazines,
bits of wrapping paper, old note cards,
anything you have on hand.


Find a ruler, sewing needle, pencil, scissors, (awl, optional),
and embroidery floss or thread, twine, ribbon, etc.
Cover a work surface with a few layers of
newsprint or an old magazine.


I chose an old calendar as my booklet cover. 
Once you select your cover, use a ruler to mark the
length and width of the finished size of your booklet.
Cut (photo above.)


Next, select the papers for the interior of the booklet,
and using the cover as a guide, mark the length and width
of the papers. For this simple booklet, I cut a total of
4 interior pages.


Fold your cover in half. Using a bone folder or your finger tip, 
press a nice crease. This is the spine.


Fold each of your 4 pages in half, then nest them
one inside the other. With a bone folder or your finger tip,
press along the fold making a nice crease.


Lay the interior pages flat, stack them on your work
surface and keep the pages aligned. Lay the cover on top
of the pages, still keeping every thing aligned.
With your ruler and a pencil, mark the center
of the spine, then mark about 1/2" in from
the top edge and from the bottom edge
of the booklet (photo above.)


Using your awl or a needle, carfeully and firmly press
straight down through all the layers.
Gingerly check to see that you did.
If you did not, just repeat the step until you do.


Choose a coordinating color of floss, thread, ribbon, etc..
This will be seen on the inside and the outside of
the book. Cut approximately 18" of floss
and thread your needle.


Time to stitch the binding. I started from the outside,
but you can certainly start inside the book.
Personal preference.
Either way, the stitch pattern is identical.

This was tough to photograph in action, so here goes:

Starting at the middle hole, the needle goes down
through all layers, then move your needle to the lower hole
and bring it up through all layers. The needle should
be back on the outside of the booklet. Next, move your needle
to the top hole and send it down through all the layers,
then bring the needle back to the center hole and
push it up through all the layers.


The outside (or inside) of your booklet should look like this.
Place one thread tail to the left of the center stitch,
and the other tail to the right of it.
Using the tails, tie a knot so that you're essentially
keeping that center thread in place. Trim tail ends.

Give me a shout if this becomes confusing to you.
 I'll do my best to get you back on track.
It's a good binding to know!

 
And here is my sweet, simple booklet
to welcome Spring.
I probably spend more time choosing
papers than I do actually constructing the booklet.
  Make some. They'll put a smile on your face & will
definitely come in handy.

Wednesday, March 9, 2011

The Marshmallow Revolt


Make these and you'll likely join me
in the revolt against store-bought.

5 easy steps gives you delectable morsels perfect for 
toasting at the campfire, melting in your next hot chocolate,
or as my husband prefers, eating right out of the container.


A close-up of the 24 reasons why I became 
a store-bought renegade. 

Sunday, March 6, 2011

Open Studio Sunday


Rainy and gray outside, warm and cozy inside.
Early this morning, I was having a ball at the drawing table 
coming up with fun & easy embroidery designs.
(Pictures and more on this soon!)
Hand work is so satisfying, and it just makes me smile.
It's that simple.

What crafts make you feel that way? I'd love to hear.


Waxed linen thread for eyes & a sweet little nose.
Complete with cottontail, he makes a wonderful friend 
and is easily held in small hands.
Quite a while ago, I sewed this bunny from
a free pattern in Living Crafts magazine.

They now have a terrific blog:


Well, I needed a break from the pen & ink bit, 
so I picked up my needles.
 I'm designing this soft, swingy girl's dress, size 2.
It's my first dress combining knit and fabric, and I'm really
excited as it takes on a life of its own.
It's a lesson in letting go and seeing where the materials take me.

Can you let go in your creative process, too? 


I love polka dots.
Preparing for my afternoon, I just finished cutting these
binding strips for the boy's quilt in the background. 
With the recipient due to arrive in just a few weeks,
I'd better get a move on!

Designing for boys is a welcome process.
Because I don't have boys of my own, I don't have personalities,
likes or dislikes to influence me. There's a certain freedom with that.

What do you enjoy making for the boys in your life? 


What about the girls, you ask?
Perfect timing: here's the purse that was being worked on 
in last Sunday's Open Studio.

Instructions, complete with photos, will be available
in my shop, as promised. Currently under construction, the shop is almost ready. You'll be the first to know when the OPEN light is on.

                                                                  
I said constant, right?


Friday, March 4, 2011

Finally Friday....

Pinwheels!


How about infusing your winter weekend with a shot of
color & movement? Small hands can help in the process,
but an adult will be needed for a few steps. While there are 
many tutorials out there, this is one method I like because it
results in a sturdier pinwheel holding up to a variety of uses.


Pull out those fabric scraps. You want pieces that will give you 
about a 4" square, give or take.  Craft felt, wool, etc. are optional.
You'll also need Pellon's double-sided fusible webbing.

(Paper pinwheels are great too, so grab those home dec.
magazines from the recycle bin!)


Make a cardboard template that measures 4" square.
(A good use for that empty cereal or tissue box.)
On the back side of your selected fabric,
craft felt (or second piece of fabric,) and paper side of the Pellon,
lightly trace your 4" cardboard template.
Using scissors, nicely cut just inside the pencil lines.


This next step is for the crafty adult: ironing.
Lay out your craft felt, fabric and Pellon.
In the above photo: turn the fabric wrong side up,
then lay the Pellon glue side down.
With the iron on steam, press according to Pellon directions. 


I let it cool for a minute before peeling off the paper.


Lay the fabric-Pellon square glue side down on top of the craft felt.
Fuse. Please do not put the hot iron directly on the craft felt.
Sticky, smelly, awful mess.


Clean up the edges with your fabric scissors, then with a
straight edge, lightly draw an "X" on one side of the pinwheel.
Cut directly on each line, stopping each time
about 1/2" from the center.


Look at one "triangle" of your pinwheel and choose either
the left or right corner. Always pull that same corner of
each "triangle" into the center.

Thread a needle with matching thread and tie a knot at the end.
Now, pull one corner into the center of the pinwheel, then
pull the opposite "triangle's" corner into the center.
Push your needle down through all layers.
Run the needle back up (above photo,) then back down again.


Repeat for the remaining two corners. This will secure the delicate
fabric tips while sewing on the button. Once the button is sewn on,
your pinwheel will be nice and sturdy.


Button hunting! Audition several options.


Ta-da!


Oh, the possibilities. How about topping a sweet gift?


Or, add a pin back and spruce up a diaper bag,
gift bag, or a sweet girl's purse.
How about attaching to festive napkin rings?

Share your pinwheels on Flickr. I'd love to see them!
Please send me any questions about the above directions.