Wednesday, May 14, 2014

Let's Have a Picnic!

We've been enjoying an early warm streak here in 
upstate NY, which has inspired me to (finally) finish 
this cheerful "S" Block quilt. 
It's just begging for a picnic, don't you think? 
Today, I'm sharing my recipe for a special springtime treat,
perfect for the picnic basket or the dinner table, 
Wild Ramps Pesto. 
Below, I share ways to incorporate it into your next meal. 
The recipe makes enough to freeze or share (above). 
Be forewarned, this savory pesto is powerful - 
a little goes a long way!

If you're unfamiliar with ramps, they're
wild-growing and of the lily family. You'll find them 
in the woods throughout the Northeast and 
as far south and west as VA and OH.
Their potent flavor is a cross between leeks and garlic,
and their foraging season is about six weeks.
If you forage for the first time, please review some videos 
on YouTube so that you're confident in what you're looking for.
So, if you're lucky enough to get your hands on some ramps, 
here's my little recipe. Adjust to suit your taste.

Ramps Pesto

1 cup walnut pieces
3/4 cup Parmesan cheese
4 modest bunches of ramps*, cleaned and rough chopped
Pinch of sea salt or Kosher salt

Place these 4 ingredients in the food processor and 
give them a few whirrs.

Then, with the machine steadily running, slowly drizzle in 
about 1/2 cup Extra Virgin Olive Oil
until the mixture is as thin or thick as you like.
Fill approximately 3 pint sized mason jars.

* This recipe considers about 13-14 ramps to be a modest bunch.
It can be frozen and will keep in the fridge for a few months.

Now, think pasta with sauteed mushrooms, onions and peas 
finished with a swirl of this savory pesto, 
or add a small dollop on your cheesy veggie omelet.
Try a generous spoonful stirred into a pot of buttery mashed potatoes.
Work a few spoonfuls into your biscuit dough....sigh.
Schmeer a bit onto a cracker. Top with your favorite cheese. Repeat.

If you make Wild Ramps Pesto, I'd love to hear how you use it! 

I'm smitten with this super fun "S" Block quilt!
The mere thought of being wrapped in all that color 
makes me happy. 
No picnic? Just add puffy clouds and a good book.

Many of the fabrics are from 
Lizzy House's Castle Peeps collection by Andover.
Thankfully, my towering scrap pile afforded me plenty of additional 
fabrics to ensure that no two alike touch each other.  

The "S" Block is a great beginner block.
It's a decent scrap buster if you have plenty of wider strips on hand.
For quilting, I stitched in the ditch of every block, stitching giant S's,
 and then in the ditch between the blue and the green borders.
I tossed it in the washer and dryer, and ta-da, 
there's that lovely crumpled-worn-and-loved look I'm so fond of!

Now, I'm off to pull together fabrics for my next two Project Linus quilts:

Ballerina 
~ 
Traffic

Thanks to everyone who voted on Facebook and here on the blog!
(quilt patterns by www.jaybirdquilt.com) 


Wednesday, May 7, 2014

Hyacinths for Mom


Happy Mother's Day,  Mom!

A quick update on my Lost and Found quilt:
The quilt top is now sewn together (above).
Layering, quilting and binding are next, 
but before I get too far with all of that, 
I'd better figure out a label! Using some of the
scraps will keep it fun and happy.

I love how the entire piece is progressing, 
and while it's a bit stronger in feel than I anticipated, 
it's undoubtedly handsome and sharp.
An unexpected and welcome surprise.
When it's done, I'll show you the final quilt. :)

The studio is a busy place these days -
design work, quilting and hand work.
Life is good. 
Thanks for stopping by!


Wednesday, April 30, 2014

Short and Sweet

The Viking and I are steadily stitching along as
more and more bags are finished for my Etsy shop and 
our very own local Cinch Art Space.
Bags will be landing in both shops soon.

As always, each bag receives special details like this 
hand covered button using Amy Butler's Fairytale fabric.
My process takes time, which I truly enjoy,
because I believe we all deserve quality and should
feel special every time we pick up that bag.
 That's my goal.  :)

 Well, the iron is on and the sewing machine is calling.
Let me know what kinds of details you look for in a hand bag.
I'd love to hear!


Wednesday, April 23, 2014

A Stack of Generosity

 I'm such a lucky girl (and quilter)!  
Just a few weeks ago, I won this stack of 
V and Co.'s "Color Me Happy" fat quarters by Moda 
on superstar Julie Herman's blog: jaybirdquilts.com.

WooHoo!! I'm ecstatic!
What a generous giveaway. 
Many thanks to Julie Herman, V and Co. and Moda.
I've been following Julie's blog for a few years,
and I think all of her quilts look fun and interesting to make.

So, imagining a fresh update for my dining room table, 
I purchased Julie's Sidekick ruler and Seaside table runner pattern.
(You can find her tools and patterns at your local or online
quilt shops. Julie provides a list by state on her blog.)

Believing one good turn deserves another,
I will use the Color Me Happy fabrics to make a quilt 
Would you help me choose the quilt pattern for 
a special child in need of comfort? 
Here's the link to see all of Jaybird's patterns, 
and here are the ones I'm leaning toward: 
Ballerina
Radio Way
Traffic
Teacup

Of course I'll post the progress of the Project Linus quilt,
and I can't wait to hear what you choose. Thanks so much!

Wednesday, April 16, 2014

They're Here!

 Yes, that's right, "the ghastlies" collection of fabrics from 
The Alexander Henry Fabrics Collection (C) 2009
are piled high on the cutting table!

You know how some fabrics just make you smile? 

This collection of fabrics is so much fun to work with. 
I can assure you that clever tulip bags, bucket bags and 
my "Essentials" purses are fast on their way to
 Cinch (in time for Cortland Blooms, April 27th),
and to my Etsy shop (which is in dire need of restocking!)
Did I mention how fun these fabrics are?!
 How about Lost and Found, you ask?
I'm happy to say progress continues.
Here's the layout I'm leaning toward. 
Personally, I think the sashing is a tad too dark; however,
the sashing will decrease in visual weight once the seams are sewn.
Before I go cutting up more fabric, if you have a moment,
 I'd love your input!
What do you think: choose a range of softer grays for 
the sashing, or leave them as they are?
Thanks a lot!


Wednesday, April 9, 2014

New Class at Cinch!


I'm thrilled to be teaching my bookmaking workshop
at Cinch on Saturday, April 26th!
There's still plenty of time to sign up, 
and with enough interest 
I'll happily teach it again.

There truly is something magical about making one's own book. 
I hope to see you there!

Last week, I began documenting my latest quilt adventure,
Lost and Found, and here's an update:
I settled in to the chain piecing and pressing.
I found it relaxing, enjoyable and so worth
the time and care.
Next, I squared up each block to measure 5.75".
As I trimmed this particular block,
something caught my eye.
Barely visible evidence of something that was.
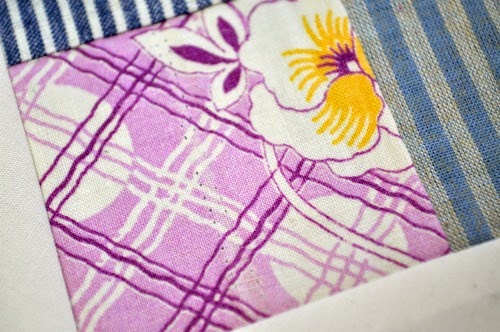
Can you see the double row of needle holes in the pink square?
A piece of trim? A hem?
One of the things that intrigues me most about 
these anonymously pieced blocks
is the mystery life each fabric lived before
being cut up and made anew.

I'm anxious to see what's next for this quilt top.
Stay tuned!

April is suddenly a whirlwind of teaching classes, taking classes, 
shop hopping, quilting, sewing and much more.
Come back to catch all the fun!


Wednesday, April 2, 2014

Lost and Found

 Over a year ago I posted about these charming 
hand pieced blocks that came into my life 
after a trip to a local antique shop. 

All this time, I've just been looking at these blocks. 
And moving them around the studio. Looking some more.
 Until finally, this past weekend, these beauties came out
of their bag, received a fresh pressing and squaring up.


I thought it would be fun to share my first attempt 
at making a quilt using existing blocks, 
let alone hand pieced blocks
made by someone else.
Lost and Found.


Who ever stitched these blocks certainly let nothing
go to waste. Do I see fragments of handkerchiefs? 
Retired work shirts and dress pants? House coats? 
One thing's for sure, they make a delightful, eclectic mix.
Here's a piece cut from a garment that includes the seam.
Love that!
Can you spy the double row of hand stitching 
near the lower left corner?
A subtle reminder that we quilters are a humble lot. 
So, what to do with these pressed and squared blocks?
Good question. Graph paper, please.
I made some sketches, chose my favorite block design
and arrived at a quilt layout based on thirty useable blocks.
The overall quilt size will be about 36" x 42", a modest crib quilt.

Next, I listed the individual pieces needed for the design, 
and with scrap fabrics, I figured out dimensions 
for each piece, as well as the overall block construction (above).
If you look closely at the sample above
you'll see that I made an adjustment after noticing that 
the right point of the inside diamond didn't touch the sashing.
Thankfully, all it took to correct this problem was to
trim the block before attaching the sashing (see the left point).
  With the design decided and the math completed,  
I auditioned fabrics that I felt would work well with 
the scrappy blocks. 
In keeping with the spirit of scrap quilts, 
I promised myself to only use a variety of fabrics 
I already had on hand.  
A lucky assortment, don't you think?

Next came the first round of cutting...no turning back!
For now, only the ivory triangles are cut.
I'll wait until after the blocks are pieced and squared up 
before I set to work cutting the sashing.
So, let the chain piecing begin!

Stay tuned for the progress on this crib quilt. 
I have a feeling it's going to be sweet!

Have any of you used inherited blocks? 
I'd love to hear what you've made!