Sunday, February 26, 2012

Let's Celebrate!

February 23, 2011 was Silver Trumpet Style's 
launch into the blog-o-sphere, and
what a fun ride the first year has been!
Thanks from the bottom of my heart to each of you 
for supporting my creative endeavors,
sending me love notes and 
simply stopping by throughout the year.
You make it all worth while!
  
...Almost as worth while as baking these
Make these and you'll wonder if you some how
 landed in Key West. WOW, they're good!

To celebrate in true Silver Trumpet Style,
I'm sharing the love by giving away 
two Birthday presents: 
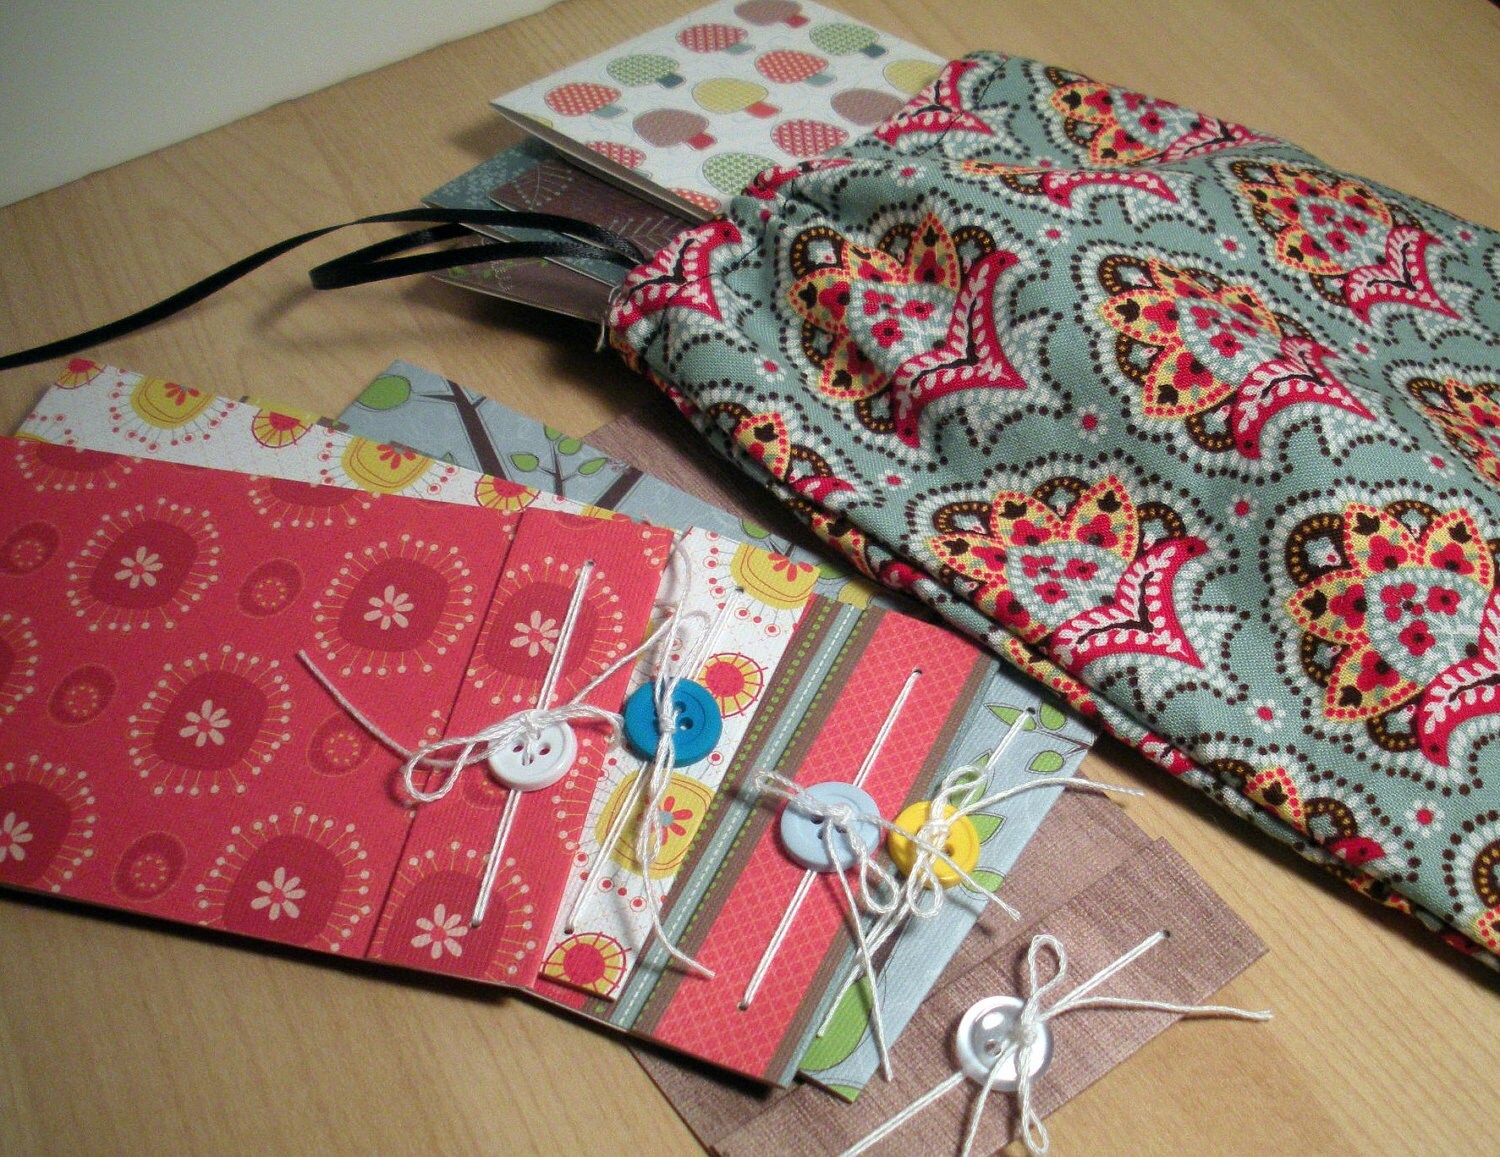
Sweet Sewer's Set
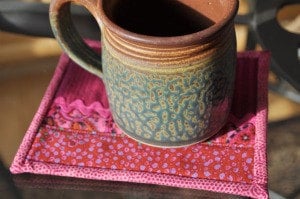
 Curl up with a cozy cuppa 
(mug not included, so sad!)
and Alicia Paulson's gorgeous,  
project-filled Embroidery Companion. 
Rest your mug on this charming Silver Trumpet 
mug mat, made with Amy Butler fabrics. 
(or choose a different one over at the shop.)

Handspun Happiness Set
Knit up an irresistibly cute hat for a small one 
in your life with Baby Beanies by Amanda Keeys!
Full of fun hat patterns, not to mention adorable 
photography, you'll have plenty of options 
for using 220 yards of Silver Trumpet 
three-ply handspun merino and corrie blend.
(The girly colors shown are pretty true to the actual yarn.
I can easily substitute a different colorway of yarn, too!)

All you have to do is tell me which set you want & why, 
and I'll announce both lucky winners on Sunday March 4th.
You have all week to comment with your choice.
 Fun, right?! Thanks for celebrating with me.

Good Luck, and here's to another
year of sharing the creative process and 
all that is Handmade With Love!

Sunday, February 19, 2012

Bow-ba-licious

Today is my niece's First Birthday party! 
Wrapping her gift is the perfect opportunity 
to make a special, handmade bow.

I Pinned a tutorial on my Happy Tutorials Board
plus I'm showing you here because it's fun!

 You'll need about a 12" square of paper 
to make one bow: 
consider recycled magazines, comic books, 
wrapping papers, marbled papers, newspaper,
brown paper bags you've decorated with 
stencils, doodles, etc.; any paper that is flexible and 
easily cut into strips.
 Cut 3/4" wide strips as follows:
 3- 12" lengths
 3- 11" lengths
 2- 10" lengths
1- 3.5" length
 Fold each end of one strip to the back as shown 
and tape at the back. Repeat for all strips except the shortest.
For that one you'll simply tape the two short ends 
together to form a loop.
 I suggest using a piece of tape to secure each unit 
as you build your bow. You don't have to, but it will keep 
the units from shifting and turning out wonky. 

Stack your three 12" units first, forming a kind of star shape.
Then similarly stack the three 11" units, and then 
the two 10" units, nesting and taping as you go. 
 By now your bow should look something like this.
Easy right? Now tape in the loop and you're
bow is ready to top a special gift.
Have fun and maybe you'll tell me the creative 
materials you use for bows!

Now, I have a party to get to! 
Wishing you all a happy & creative week.


Sunday, February 12, 2012

To My Heart's Content


ohlittlerabbit.etsy.com, an excellent shop!
In honor of Valentine's Day, I've collected some of
my favorite Etsy finds & Friends! 
BurlapAndBlue.etsy.com

BurgundyDelights.etsy.com

sveika.etsy.com

ponyandpoppy.etsy.com

BeMyBee.etsy.com, my talented friend Marcia Terry
silvertrumpetstyle.etsy.com, plenty of red mug mats!
 
If all that red doesn't fill your heart, 
maybe STOMP will. Enjoy! 

Happy Valentine's Day every one! 
Wishing you a day full of love.


Sunday, February 5, 2012

Take Flight


Do you need more creativity? 
Do you need a change?

When I see a moth or butterfly I ask myself 
these questions. They also seem appropriate to ask 
as winter solitude gives way to spring.

Here's apartment therapy's nifty tutorial for anyone 
needing a little butterfly magic in the middle of winter. 

Check out Heartland Paper's beautiful butterfly chandelier!


Butterfly mobile close up

You can find even more fun tutorials on my Pinterest 
Happy Tutorials board!